Disaster-Preparedness
Jump to navigation
Jump to search
Contents
Motion Sensor
Under construction until the end of Fall 2014 semester unless indicated otherwise.
Purpose
- Detect and measure motion.
- Use multiple sensors to increase accuracy/reliability/functionality.
- Be cheap and portable.
- Provide data that can be aggregated over a network.
Sensors
- We used tilt switches, a piezo element, a laser / photoresistor combo, and an accelerometer.
- We specified thresholds for each
Tilt
Use
- A tilt switch uses a material to complete a circuit (E.G. press a button) when it reaches either end of the container.
- We used mercury switches on the X and Z axes.
- The Y axis wasn't very sensitive. It only seemed useful for seeing if the device had flipped over.
- Tilt switches work best when the motion is parallel to them. This loss of resolution can be minimized by adding more sensors at half-steps. For example, we could add two tilt in-between XZ to measure diagonal motion more effectively. (add a picture)
- We looked exclusively for change. This means we didn't care about what state the tilt switch was in, just if it had changed since the last read.
- We averaged readings so that lots of activity in a small time frame would be easier to recognize.
- Noise isn't an issue.
Wiring
- Power, ground, and signal.
- 10k resistor on power.
- Signal is digital.
Code Sample
const int tiltPin = 2;
int tiltState = 0;

void setup() {
  pinMode(tiltPin, INPUT);
}

void loop(){
  tiltState = digitalRead(tiltPin);
}
Resources
- [wikipedia]
- [useful code]
Piezo Element
Use
- A very cheap, diverse piece of kit.
- Can be used as a button, a knock sensor, to detect vibration, to detect sound, or to produce sound similar to a buzzer.
- We used it as a vibration sensor.
- Vibration sensitivity is increased dramatically when the piezo element is attached to a solid object by a weight, glue, or tape.
Wiring
- Signal and ground. Signal serves as power.
- 1k resistor on the signal; 10k worked similarly, so 1k+ is probably fine
- analog
- minimal noise
Code Sample
const int piezoPin = 2;
int piezoState = 0;

void setup() {
  pinMode(piezoPin, INPUT);
}

void loop(){
  piezoState = analogRead(piezoPin);
}
Resources
Accelerometer
Use
- It didn't fit on the normally sized breadboard so we ran power/ground underneath and used the one available row for the xyz/sleep pins. This was a non-issue on the prototype board.
- There are existing code libraries but we didn't use them. They can be found [here] with examples. We could still use this library to setup the accelerometer, but I've written my own library for reading values and have preferred to use that.
- Noise was an issue, but the noise was reduced considerably when using a prototype board instead of a breadboard.
Wiring
- Power, ground, xyz, and sleep. Pins are labeled on the device.
- The device can use Arduino's pullup resistors, so no external resistors are required.
- xyz is analog and sleep is digital.
Code Sample
Using existing libraries,
#include "Accelerometer.h"

Accelerometer acc = Accelerometer();

void setup()
{
  Serial.begin(9600);

  //        SL GS 0G X   Y   Z
  acc.begin(3, 4, 5, A0, A1, A2);

//calibrate for a start position
Serial.println("Please place the Accelerometer on a flat\nLevel surface");
delay(2000);//Give user 2 seconds to comply
acc.calibrate();
}

void loop()
{
  delay(2000);
  acc.read();
  Serial.print(acc._Xgs);
  Serial.print("x, ");
  Serial.print(acc._Ygs);
  Serial.print("y, ");
  Serial.print(acc._Zgs);
  Serial.println("z");
}
Laser / Photoresistor
Use
- The idea is that the laser will be cast upon the photoresistor. As the laser shakes it'll move from the photoresistor. The laser is on a spring and so it always "settles" back into its original position.
- Noise isn't an issue.
Wiring
- Power, ground, and signal to the laser. Signal and ground to the photoresistor.
- resistors (check)
- Laser can be digital or analog. Can also use pulse width modulation. The photoresistor is analog.
Code Sample
const int laserPin = 5;
const int photoPin = A5;
int photoValue = 0;

void setup()
{
  Serial.begin(9600);

  pinMode(laserPin, OUTPUT);
  pinMode(photoPin, INPUT);
}

void loop()
{
  delay(2000);

  digitalWrite(laserPin, HIGH);
  photoValue = analogRead(photoPin);
}
Resources
Housing
Case
- We used a preexisting solution.
- It was able to fit our Galileo, the prototype board fitted on top of two springs, and the battery pack.
- waterproof
- no support for external wires
Amplifying Motion via Resonate Frequency
- We placed the prototype board on two springs to amplify weaker motions. The reason for this amplification is due to the weight of the prototype board being focused on the two springs in addition to the inherent shakiness of the springs.
- In essence this is changing the [resonate frequency] of the object. Think about a tuning fork. When a tuning fork is struck it amplifies its resonate frequency and quiets other frequencies. It provides a nearly perfect note.
Power
- We used [this battery pack] along with 4 new alkaline batteries to provide power to the Galileo.
Code
Readings Library
I wrote a library to read values. It includes the following functionality.
- offsetting by the beginning value
- reading multiple times per datapoint
- getting difference between current datapoint and last datapoint
- checking if the current datapoint is past a given threshold
- storing old datapoints
- averaging old datapoints
- standard deviation of old datapoints
- outputting values
- automatically distinguishing analog/digital pins
Details
General layout
- declare variables
- setup - open serial, erase files, output headers, and set pin modes
- read values - each sensor is read separately
- output values - construct string for output, then output to SD or serial
Sensors
- toggled use of sensors
- declares the pins and thresholds for each sensor to then declare an infrastructure for reading
- relatively short delay between reads due to accelerometer wait times
- each sensor is handled individually with clearly documented code
Output
- toggled use of writing to SD card / serial
- uses output_file as ofstream to output to SD
- declares constants for system commands
- overwrites file every boot
Research
These are notes and observations from research.
Earthquake
- occur due to movement in tectonic plates
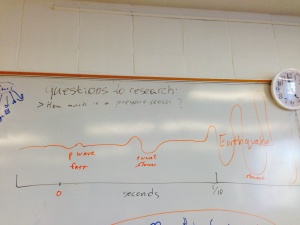
- only seconds of notice, 5-10 seconds
- [p waves] are much faster than [s waves] and the actual waves that cause the earthquake.
- earthquakes travel at about the same speed as data networks
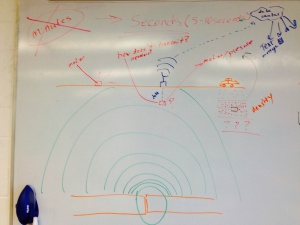
- can be measured by motion (on surface or underground) and pressure (underground)
- downside of underground monitoring is 1) power and 2) transmission
- can use repeaters or solar power to solve these issues
- advantage of being underground is distance from noise (such as animals and humans) and being closer to the source of the earthquake
- being attached to rock is good
- downside of underground monitoring is 1) power and 2) transmission
Resources
Tsunami
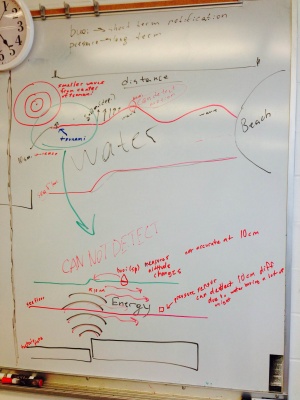
- in the deep sea pressure sensors are used to measure the relatively small sea-level change (in centimeters)
- nearer to shore, where waves start to form, altitude could be measured by buoy
- travel at hundreds of miles per hour
- tsunami headquarters in Hawaii
- notification could be minutes to hours in advance depending on distance from source of tsunami
- height/speed of wave reduces with distance


