Difference between revisions of "Solar-hot-test"
(→Photos) |
(→First Day of Setup) |
||
| Line 30: | Line 30: | ||
*Yup, we really cut 'er open. | *Yup, we really cut 'er open. | ||
| − | |||
http://wiki.cs.earlham.edu/images/a/a9/Making_copper_coil.JPG | http://wiki.cs.earlham.edu/images/a/a9/Making_copper_coil.JPG | ||
| + | *Ehren carefully coils our soft copper tubing. | ||
http://wiki.cs.earlham.edu/images/4/45/Bending_copper.JPG | http://wiki.cs.earlham.edu/images/4/45/Bending_copper.JPG | ||
| + | *He avoids kinking it! | ||
http://wiki.cs.earlham.edu/images/5/5e/Copper_coil.JPG | http://wiki.cs.earlham.edu/images/5/5e/Copper_coil.JPG | ||
| + | *He bends both the input and the output ends up to the top so they will easily come out of the barrell. | ||
| + | |||
| − | |||
http://wiki.cs.earlham.edu/images/0/04/Coil_insertion.JPG | http://wiki.cs.earlham.edu/images/0/04/Coil_insertion.JPG | ||
| + | *We hold open the top of the barrell ( part of which is still attached) and place the coils inside. | ||
http://wiki.cs.earlham.edu/images/3/36/In_out_barrel.JPG | http://wiki.cs.earlham.edu/images/3/36/In_out_barrel.JPG | ||
| + | *"Remember guys, this one is the input and that one is the output" | ||
http://wiki.cs.earlham.edu/images/4/49/Taped_down.JPG | http://wiki.cs.earlham.edu/images/4/49/Taped_down.JPG | ||
| + | *Meanwhile: The plastic panels have been duct taped back onto the solar hot water heater. This prevents rain water, etc. from getting in. | ||
http://wiki.cs.earlham.edu/images/b/bf/Sealing_the_lid.JPG | http://wiki.cs.earlham.edu/images/b/bf/Sealing_the_lid.JPG | ||
| + | *We duct tape the top of the barrell too. | ||
| − | |||
http://wiki.cs.earlham.edu/images/e/ec/Sweat_prep.JPG | http://wiki.cs.earlham.edu/images/e/ec/Sweat_prep.JPG | ||
| + | *Ehren ( who has seen someone sweat pipes before) prepares the tubing by sanding off any dirt. | ||
http://wiki.cs.earlham.edu/images/5/52/Mister_sandman.JPG | http://wiki.cs.earlham.edu/images/5/52/Mister_sandman.JPG | ||
http://wiki.cs.earlham.edu/images/9/92/Flux.JPG | http://wiki.cs.earlham.edu/images/9/92/Flux.JPG | ||
| + | *Flux is applied. | ||
http://wiki.cs.earlham.edu/images/5/57/Heating_it_up.JPG | http://wiki.cs.earlham.edu/images/5/57/Heating_it_up.JPG | ||
| + | *First the fitting and pipe are heated up. | ||
http://wiki.cs.earlham.edu/images/f/fb/Sweating.JPG | http://wiki.cs.earlham.edu/images/f/fb/Sweating.JPG | ||
| + | "Once they are quite hot the solder is added. | ||
http://wiki.cs.earlham.edu/images/b/b3/More_sweating.JPG | http://wiki.cs.earlham.edu/images/b/b3/More_sweating.JPG | ||
| + | *The solder sweats up between the tubing and the fitting. | ||
http://wiki.cs.earlham.edu/images/f/f1/Colin_sweats.JPG | http://wiki.cs.earlham.edu/images/f/f1/Colin_sweats.JPG | ||
| + | *Colin also sweats! | ||
http://wiki.cs.earlham.edu/images/a/a6/Colin_is_still_sweating.JPG | http://wiki.cs.earlham.edu/images/a/a6/Colin_is_still_sweating.JPG | ||
http://wiki.cs.earlham.edu/images/4/46/Colin_sweats_some_more.JPG | http://wiki.cs.earlham.edu/images/4/46/Colin_sweats_some_more.JPG | ||
| + | *Horrah! Both are successfully sweated! | ||
| − | |||
http://wiki.cs.earlham.edu/images/b/b7/Unit_hose_connect.JPG | http://wiki.cs.earlham.edu/images/b/b7/Unit_hose_connect.JPG | ||
| + | *We used teflon pipe tape to seal our connector fittings. These connectors allow us to attach our hose to our hot water heater. | ||
http://wiki.cs.earlham.edu/images/4/4f/Hooking_up_hose.JPG | http://wiki.cs.earlham.edu/images/4/4f/Hooking_up_hose.JPG | ||
| + | *Colin and Kate work together to securing attached the hoses. | ||
http://wiki.cs.earlham.edu/images/0/0a/Proud_workers.JPG | http://wiki.cs.earlham.edu/images/0/0a/Proud_workers.JPG | ||
| + | Hey, we accomplished a lot today! | ||
| − | + | ===Second Day of Setup=== | |
http://wiki.cs.earlham.edu/images/2/21/Dan_gets_down.JPG | http://wiki.cs.earlham.edu/images/2/21/Dan_gets_down.JPG | ||
Revision as of 21:46, 2 August 2006
Photos
- Acquiring the hot water heating unit
http://wiki.cs.earlham.edu/images/6/6e/Unit_retrieval.JPG
- We hope to be able to reuse an older hot water heater that Charlie picked up when the previous owner was done with it.
http://wiki.cs.earlham.edu/images/4/44/Dirty_unit.JPG
- It has been stored in the woods awaiting an occasion for retrieval and testing.
http://wiki.cs.earlham.edu/images/b/b7/On_truck.JPG
- Ready to transport the hot water heater from The Ranch to The Farm.
http://wiki.cs.earlham.edu/images/b/bc/Dry_dock.JPG
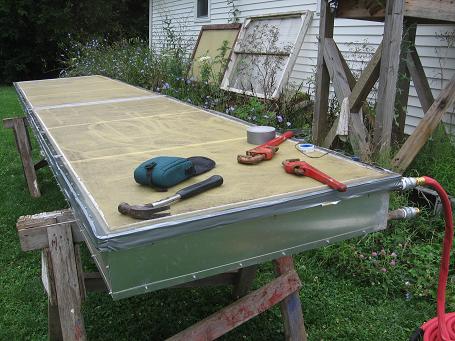
- Set up for minor solar hot water heater surgery.
http://wiki.cs.earlham.edu/images/0/08/Unit_interior.JPG
- The inside appears to be well preserved!
First Day of Setup
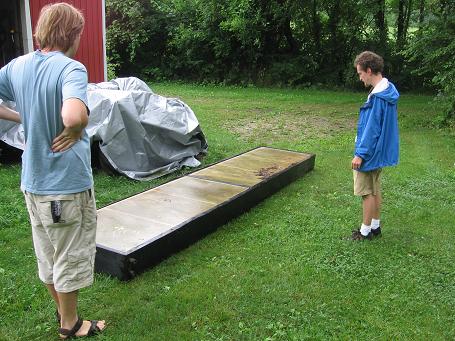
- To test the effectiveness of the solar hot water heater we set up a lab that will allow us to measure the effectiveness of the solar hot water in converting solar energy into a rise in water temperature. See the specifics for this lab and the schematic for it under "Documents in Progress- Solar H2O"
http://wiki.cs.earlham.edu/images/5/50/The_barrel.JPG
- For this lab we will use this barrell to house the copper coils that will transfer the heat from the water running through the solar hot water heater to the water that would normally be used in the household.
Note: For the lab the heated water just stays in the barrell.
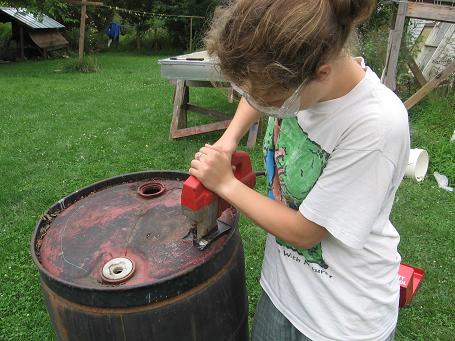
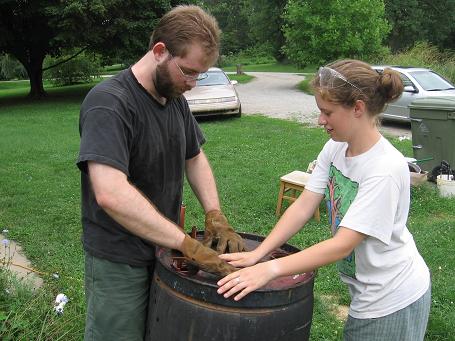
http://wiki.cs.earlham.edu/images/9/92/Kate_cuts_barrel.JPG
- To put the copper coil inside we have to cut it open. (We would take more care to seal it back up if this wasn't our test run.)
http://wiki.cs.earlham.edu/images/f/f0/More_cutting_kate.JPG
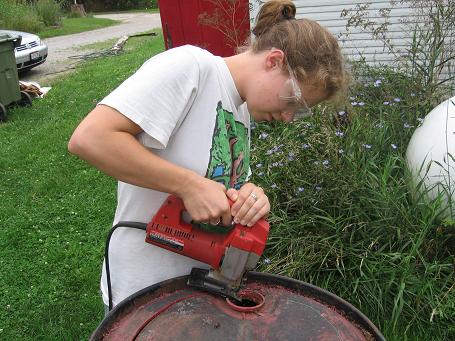
- Yup, we really cut 'er open.
http://wiki.cs.earlham.edu/images/a/a9/Making_copper_coil.JPG
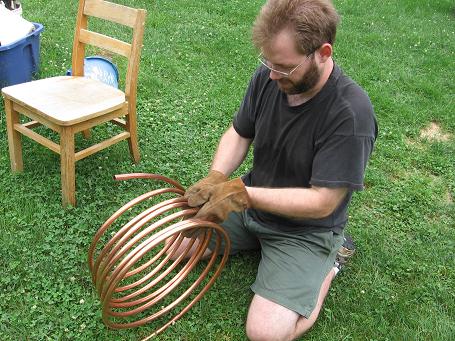
- Ehren carefully coils our soft copper tubing.
http://wiki.cs.earlham.edu/images/4/45/Bending_copper.JPG
- He avoids kinking it!
http://wiki.cs.earlham.edu/images/5/5e/Copper_coil.JPG
- He bends both the input and the output ends up to the top so they will easily come out of the barrell.
http://wiki.cs.earlham.edu/images/0/04/Coil_insertion.JPG
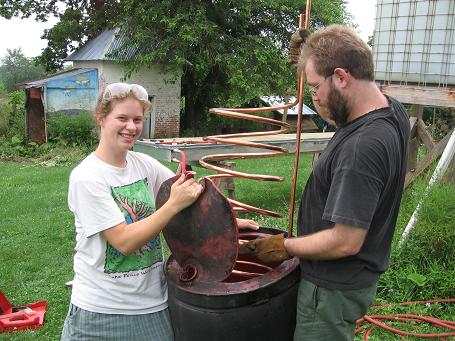
- We hold open the top of the barrell ( part of which is still attached) and place the coils inside.
http://wiki.cs.earlham.edu/images/3/36/In_out_barrel.JPG
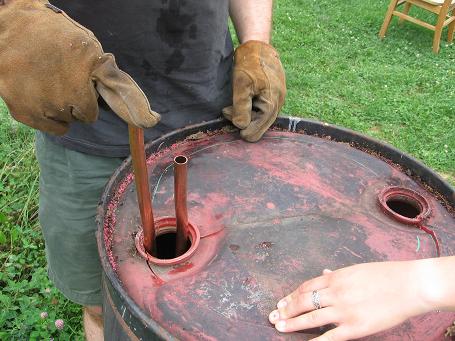
- "Remember guys, this one is the input and that one is the output"
http://wiki.cs.earlham.edu/images/4/49/Taped_down.JPG
- Meanwhile: The plastic panels have been duct taped back onto the solar hot water heater. This prevents rain water, etc. from getting in.
http://wiki.cs.earlham.edu/images/b/bf/Sealing_the_lid.JPG
- We duct tape the top of the barrell too.
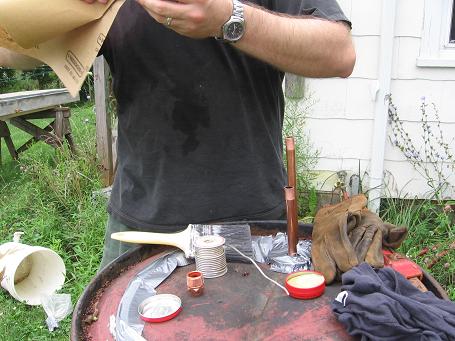
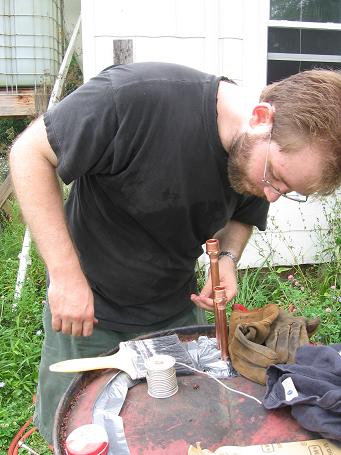
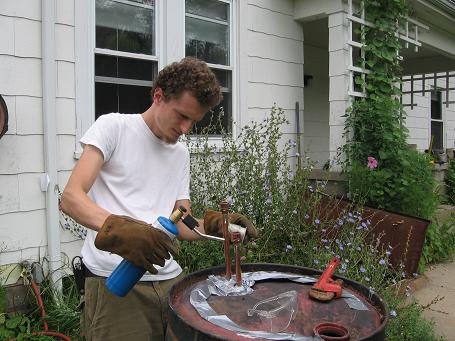
http://wiki.cs.earlham.edu/images/e/ec/Sweat_prep.JPG
- Ehren ( who has seen someone sweat pipes before) prepares the tubing by sanding off any dirt.
http://wiki.cs.earlham.edu/images/5/52/Mister_sandman.JPG
http://wiki.cs.earlham.edu/images/9/92/Flux.JPG
- Flux is applied.
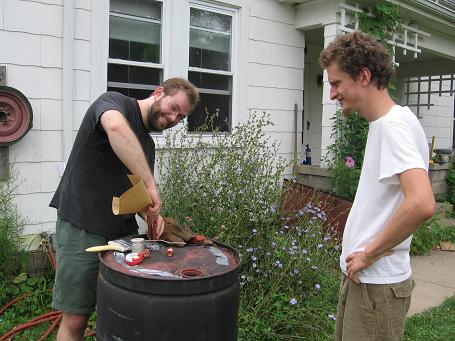
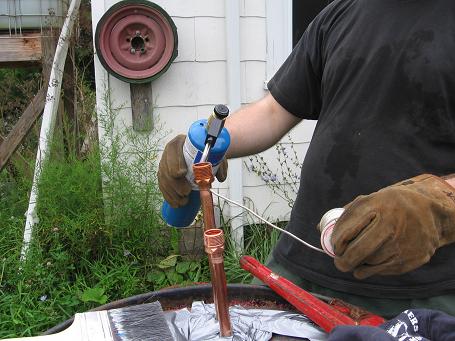
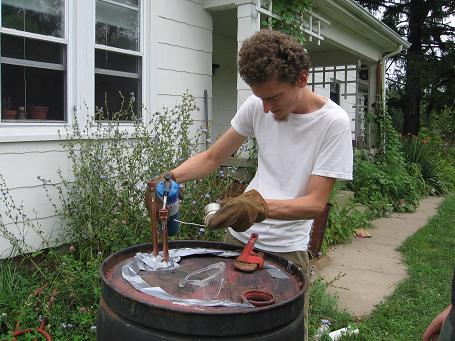
http://wiki.cs.earlham.edu/images/5/57/Heating_it_up.JPG
- First the fitting and pipe are heated up.
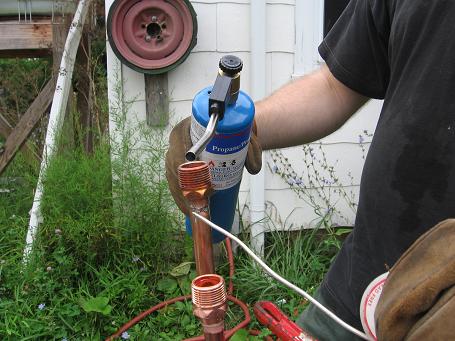
http://wiki.cs.earlham.edu/images/f/fb/Sweating.JPG "Once they are quite hot the solder is added.
http://wiki.cs.earlham.edu/images/b/b3/More_sweating.JPG
- The solder sweats up between the tubing and the fitting.
http://wiki.cs.earlham.edu/images/f/f1/Colin_sweats.JPG
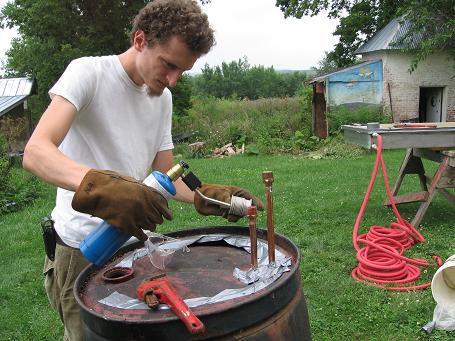
- Colin also sweats!
http://wiki.cs.earlham.edu/images/a/a6/Colin_is_still_sweating.JPG
http://wiki.cs.earlham.edu/images/4/46/Colin_sweats_some_more.JPG
- Horrah! Both are successfully sweated!
http://wiki.cs.earlham.edu/images/b/b7/Unit_hose_connect.JPG
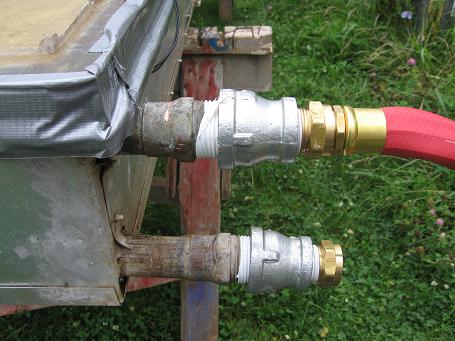
- We used teflon pipe tape to seal our connector fittings. These connectors allow us to attach our hose to our hot water heater.
http://wiki.cs.earlham.edu/images/4/4f/Hooking_up_hose.JPG
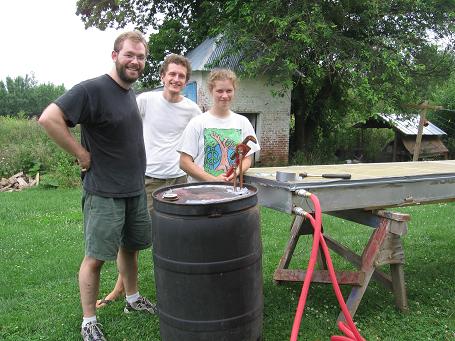
- Colin and Kate work together to securing attached the hoses.
http://wiki.cs.earlham.edu/images/0/0a/Proud_workers.JPG Hey, we accomplished a lot today!
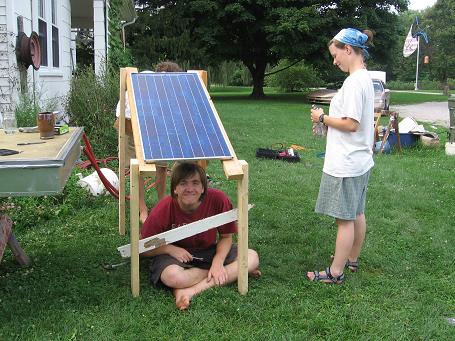
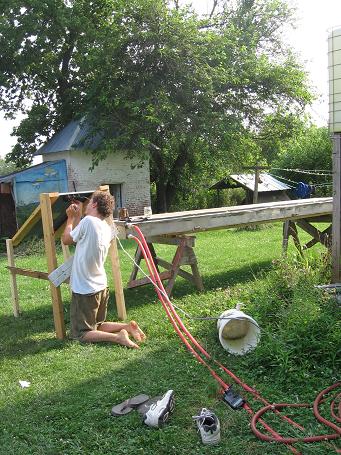
Second Day of Setup
http://wiki.cs.earlham.edu/images/2/21/Dan_gets_down.JPG
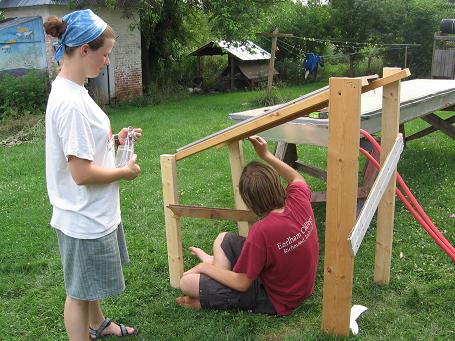
http://wiki.cs.earlham.edu/images/4/46/Under_the_panel.JPG
http://wiki.cs.earlham.edu/images/5/55/Colin_checks_for_a_pulse.JPG
http://wiki.cs.earlham.edu/images/7/78/Kneeling_before_the_sun.JPG
http://wiki.cs.earlham.edu/images/b/b2/Show_me_the_power.JPG
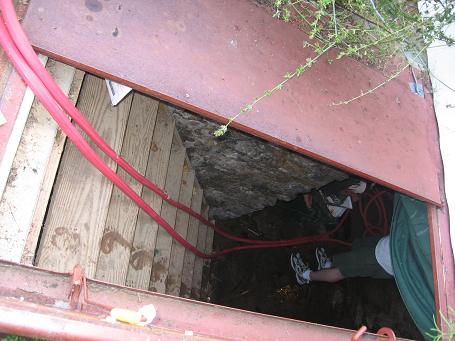
http://wiki.cs.earlham.edu/images/a/a3/Where_the_hose_goes.JPG
http://wiki.cs.earlham.edu/images/a/a7/Into_the_darkness.JPG