Difference between revisions of "Energy Monitoring Hardware"
(→Building Monitoring Data Table) |
m |
||
| (9 intermediate revisions by 4 users not shown) | |||
| Line 1: | Line 1: | ||
==Harvest Scripts == | ==Harvest Scripts == | ||
| + | These run on [[Proto]], generally. | ||
There is a unique harvest script for every individual building, but the only differences between these scripts are the value of the ip number and the . | There is a unique harvest script for every individual building, but the only differences between these scripts are the value of the ip number and the . | ||
| Line 33: | Line 34: | ||
| 159.28.165.100 | | 159.28.165.100 | ||
| 159.28.16.100 | | 159.28.16.100 | ||
| − | | | + | | Yes |
| 00:80:67:82:99:34 | | 00:80:67:82:99:34 | ||
| No | | No | ||
| Line 45: | Line 46: | ||
| 159.28.165.101 | | 159.28.165.101 | ||
| 159.28.16.101 | | 159.28.16.101 | ||
| − | | | + | | Yes |
| 00:80:67:82:99:2e | | 00:80:67:82:99:2e | ||
| No | | No | ||
| Line 57: | Line 58: | ||
| 159.28.165.102 | | 159.28.165.102 | ||
| 159.28.16.102 | | 159.28.16.102 | ||
| − | | | + | | Yes |
| 00:80:67:82:99:32 | | 00:80:67:82:99:32 | ||
| No | | No | ||
| Line 69: | Line 70: | ||
| 159.28.165.103 | | 159.28.165.103 | ||
| 159.28.16.103 | | 159.28.16.103 | ||
| − | | | + | | Yes |
| 00:80:67:82:99:38 | | 00:80:67:82:99:38 | ||
| No | | No | ||
| Line 81: | Line 82: | ||
| 159.28.165.104 | | 159.28.165.104 | ||
| 159.28.16.104 | | 159.28.16.104 | ||
| − | | | + | | Yes |
| 00:80:67:82:99:2D | | 00:80:67:82:99:2D | ||
| No | | No | ||
| Line 93: | Line 94: | ||
| 159.28.165.105 | | 159.28.165.105 | ||
| 159.28.16.105 | | 159.28.16.105 | ||
| − | | | + | | Yes |
| 00:80:67:82:99:3d | | 00:80:67:82:99:3d | ||
| No | | No | ||
| Line 105: | Line 106: | ||
| 159.28.165.89 | | 159.28.165.89 | ||
| 159.28.16.89 | | 159.28.16.89 | ||
| − | | | + | | Yes |
| 00:80:67:82:99:29 | | 00:80:67:82:99:29 | ||
| No | | No | ||
| Line 120: | Line 121: | ||
| No | | No | ||
| | | | ||
| + | | | ||
| | | | ||
| | | | ||
| | | | ||
|- | |- | ||
| − | | | + | | Wildman(Now Noyes) |
| No | | No | ||
| − | | | + | | |
| − | | 159.28. | + | | 159.28.23.24 |
| − | | | + | | Yes |
| − | | 00:80:67:82: | + | | 00:80:67:82:DD:88 |
| No | | No | ||
| 62.5 | | 62.5 | ||
| Line 148: | Line 150: | ||
| | | | ||
|- | |- | ||
| − | | | + | | AWC |
| No | | No | ||
| 159.28.25.95 | | 159.28.25.95 | ||
| 159.28.25.95 | | 159.28.25.95 | ||
| − | | | + | | Same IP |
| 00:80:67:82:DD:6B | | 00:80:67:82:DD:6B | ||
| No | | No | ||
| Line 177: | Line 179: | ||
| 159.28.26.33 and 159.28.26.36 | | 159.28.26.33 and 159.28.26.36 | ||
| Yes | | Yes | ||
| − | | | + | | 20:bb:c6:00:a2:58 and 20:bb:c6:01:13:f3 |
| No | | No | ||
| | | | ||
| Line 199: | Line 201: | ||
| No | | No | ||
| | | | ||
| + | | | ||
| | | | ||
| | | | ||
| Line 264: | Line 267: | ||
| Unknown | | Unknown | ||
| (Total Feed Size - Measured Feed Sizes) | | (Total Feed Size - Measured Feed Sizes) | ||
| + | | | ||
| + | | | ||
| + | |- | ||
| + | | Spare (Taken from Noyes) | ||
| + | | No | ||
| + | | 159.28.39.52 | ||
| + | | 159.28.23.24 | ||
| + | | Yes | ||
| + | | 00:80:67:82:DC:CF | ||
| + | | No | ||
| + | | | ||
| + | | | ||
| + | | | ||
| + | | | ||
| + | |- | ||
| + | | Spare | ||
| + | | No | ||
| + | | | ||
| + | | 159.28.25.95 | ||
| + | | Yes | ||
| + | | 00:80:67:82:DD:77 | ||
| + | | No | ||
| + | | | ||
| + | | | ||
| | | | ||
| | | | ||
| Line 317: | Line 344: | ||
* The EGX100 Manual is also helpful to have on hand to decode the blinking lights. | * The EGX100 Manual is also helpful to have on hand to decode the blinking lights. | ||
* The reset button on the EGX100 only power cycles the device, it does not actually clear any data according to the manual. | * The reset button on the EGX100 only power cycles the device, it does not actually clear any data according to the manual. | ||
| + | * If the IP address is lost, visit https://www.schneider-electric.com/en/faqs/FA212273/ | ||
== Mounting an EGX100 for Installation in Building == | == Mounting an EGX100 for Installation in Building == | ||
| Line 341: | Line 369: | ||
* [[Media:EGX_100_installation.pdf| EGX100 Installation Guide]] | * [[Media:EGX_100_installation.pdf| EGX100 Installation Guide]] | ||
* [[Media:EGX_100_userguide.pdf| EGX100 User Guide]] | * [[Media:EGX_100_userguide.pdf| EGX100 User Guide]] | ||
| + | * [[Siemens Sentron Pac3200]] | ||
| + | * [[PowerLogic PM800]] | ||
| + | * [[Sepam Series 20]] | ||
Latest revision as of 14:32, 28 November 2018
Contents
- 1 Harvest Scripts
- 2 Building Monitoring Data Table
- 3 Correct EGX100 Dip Switch States
- 4 Siemens Sentron Pac3200
- 5 EGX100 and Voltage Regulator
- 6 EGX100 and the Enercept Meter
- 7 Setting up an EGX100
- 8 Mounting an EGX100 for Installation in Building
- 9 Coloring Conventions for Wires Connecting EGX100 to Enercept Meters
- 10 Documentation
Harvest Scripts
These run on Proto, generally.
There is a unique harvest script for every individual building, but the only differences between these scripts are the value of the ip number and the . The harvest scripts are called by cron every minute.
Procedure for the Script
- 0. Sets a timestamp.
- 1. Sets a variable $pReal to the return value of java --cp with the following arguments:
- filepath to the production directory
- ModbusReadDemand
- the ip number of the EGX100 of the building in question
- the amperage correction of the building in question.
This return value represents electrical energy usage.
- 2. Connects to the energy database.
- 3. Inserts into the electrical_energy table (located within the energy database) a row for the energy usage of the building in question at the time of the timestamp.
Building Monitoring Data Table
| Building | Installed? | EGX100 Old IP | EGX100 New IP | New IP used? | MAC Addr. | Directly off main switch? | Amperage Correction | Feed Size (Amps) | Square Footage* | Occupancy |
| Bundy | Yes | 159.28.165.100 | 159.28.16.100 | Yes | 00:80:67:82:99:34 | No | 31.25 | 800 | 50,012 | 165 |
| Barrett | Yes | 159.28.165.101 | 159.28.16.101 | Yes | 00:80:67:82:99:2e | No | 15.625 | 1600 | 30,636 | 147 |
| Wilson | Yes | 159.28.165.102 | 159.28.16.102 | Yes | 00:80:67:82:99:32 | No | 62.5 | 300/400 | 22,962 | 56 |
| Warren | Yes | 159.28.165.103 | 159.28.16.103 | Yes | 00:80:67:82:99:38 | No | 62.5 | 300/400 | 22,962 | 56 |
| Mills | Yes | 159.28.165.104 | 159.28.16.104 | Yes | 00:80:67:82:99:2D | No | 31.25 | 800 (bus bar) | 132 | |
| OA | Yes | 159.28.165.105 | 159.28.16.105 | Yes | 00:80:67:82:99:3d | No | 31.25 | 800 | 26,703 | 122 |
| Hoerner | Yes | 159.28.165.89 | 159.28.16.89 | Yes | 00:80:67:82:99:29 | No | 62.5 | 300/400 | 84 | |
| Carpenter | No | No | ||||||||
| Wildman(Now Noyes) | No | 159.28.23.24 | Yes | 00:80:67:82:DD:88 | No | 62.5 | 300/400 | |||
| Lilly | No | No | 61,000 | |||||||
| AWC | No | 159.28.25.95 | 159.28.25.95 | Same IP | 00:80:67:82:DD:6B | No | 31.25 | 800 | ||
| Runyan | No | Yes | ||||||||
| Stanley | Yes | 159.28.100.55 and 159.28.100.66 | 159.28.26.33 and 159.28.26.36 | Yes | 20:bb:c6:00:a2:58 and 20:bb:c6:01:13:f3 | No | ||||
| Dennis | No | No | ||||||||
| Noyes | No | No | ||||||||
| Tyler | No | No | ||||||||
| LBC | No | Yes | ||||||||
| Stout | No | No | ||||||||
| Total | Yes | 159.28.27.252 | 159.28.27.252 | Same IP | 00:80:67:81:e9:cd | No | ||||
| Remainder | No | No | Unknown | (Total Feed Size - Measured Feed Sizes) | ||||||
| Spare (Taken from Noyes) | No | 159.28.39.52 | 159.28.23.24 | Yes | 00:80:67:82:DC:CF | No | ||||
| Spare | No | 159.28.25.95 | Yes | 00:80:67:82:DD:77 | No |
* : By Square Footage we mean the summed square footage of all the floors
Mills energy usage can be checked with: Total_of_the_U - (Warren + Wilson) = Mills
Correct EGX100 Dip Switch States
| Pin Number | 1 | 2 | 3 | 4 | 5 | 6 |
| Up | Down | Down | Up | Up | Up | Up | Up |
Siemens Sentron Pac3200
EGX100 and Voltage Regulator
The voltage regulator takes 110/220VAC and converts it to 24VDC for the EGX100.
The V- port on the voltage regulator connects to port #6 on the EGX100
The V+ port on the voltage regulator connects to port #7 on the EGX100
EGX100 and the Enercept Meter
A solid orange wire goes from port #3 on the EGX100 to the + port on the RS485 node of the Enercept meter.
A solid brown wire goes from port #4 on the EGX100 to the - port on the RS485 node of the Enercept meter.
A solid green wire goes from port #5 on the EGX100 to the shield port (S) on the RS485 node of the Enercept meter
A 100 Ohm resistor is placed between the + and - ports on connector that plugs into the Enercept meter.
Setting up an EGX100
Instructions
- Configure your computer's IP Manually. Set IP to 169.254.0.11 and subnet to 255.255.0.0. Apply these changes.
- Connect your computer to the 10/100 BASE TX port on the EGX100 with an ethernet cord.
- Type in the default IP address, 169.254.0.10, into a web browser, a password prompt should appear.
- If this does not work make sure you're on the correct subnet.
- If the EGX 100 is already configured (i.e. not the default configuration), be sure to be on the subnet 255.255.248.0 and assign your ip to the gateway ip 159.28.160.1
- Enter the default username is Administrator and the default password is Gateway
- Click on "Setup" in the top menu bar.
- Click "SNMP" on the sidebar
- Check the box "Enable SNMP" and configure the rest of the settings: contact information to "Charlie Peck," set system name and system location appropriately.
- Click the "Apply" button to apply changes.
- Click on "Ethernet & TCP/IP" in the sidebar
- Configure the TCP/IP information here.
- IP address for the EGX is in the table above, gateway is 159.28.160.1, subnet is 255.255.248.0
- Click "Apply" the device will essentially reboot and you will have to log back in to make any more changes. Login through the new device gateway and subnet to make sure changes stuck.
- Log out of the EGX.
- That's it the device is configured and good to go.
Notes:
- This is easiest if your computer's wifi is off.
- Troubleshooting with Wireshark and the ping command will reveal a lot if you make a typo in one of the fields.
- The EGX100 Manual is also helpful to have on hand to decode the blinking lights.
- The reset button on the EGX100 only power cycles the device, it does not actually clear any data according to the manual.
- If the IP address is lost, visit https://www.schneider-electric.com/en/faqs/FA212273/
Mounting an EGX100 for Installation in Building
- Cut a length of din rail sufficient to mount an EGX100 and its power supply. 13 cm is sufficient.
- Place the rail so that its center is as close to the box's center as possible. Mark holes at the rail hole locations and drill holes into plastic box at those locations.
- Turn the screws into the holes to secure the rail onto the box.
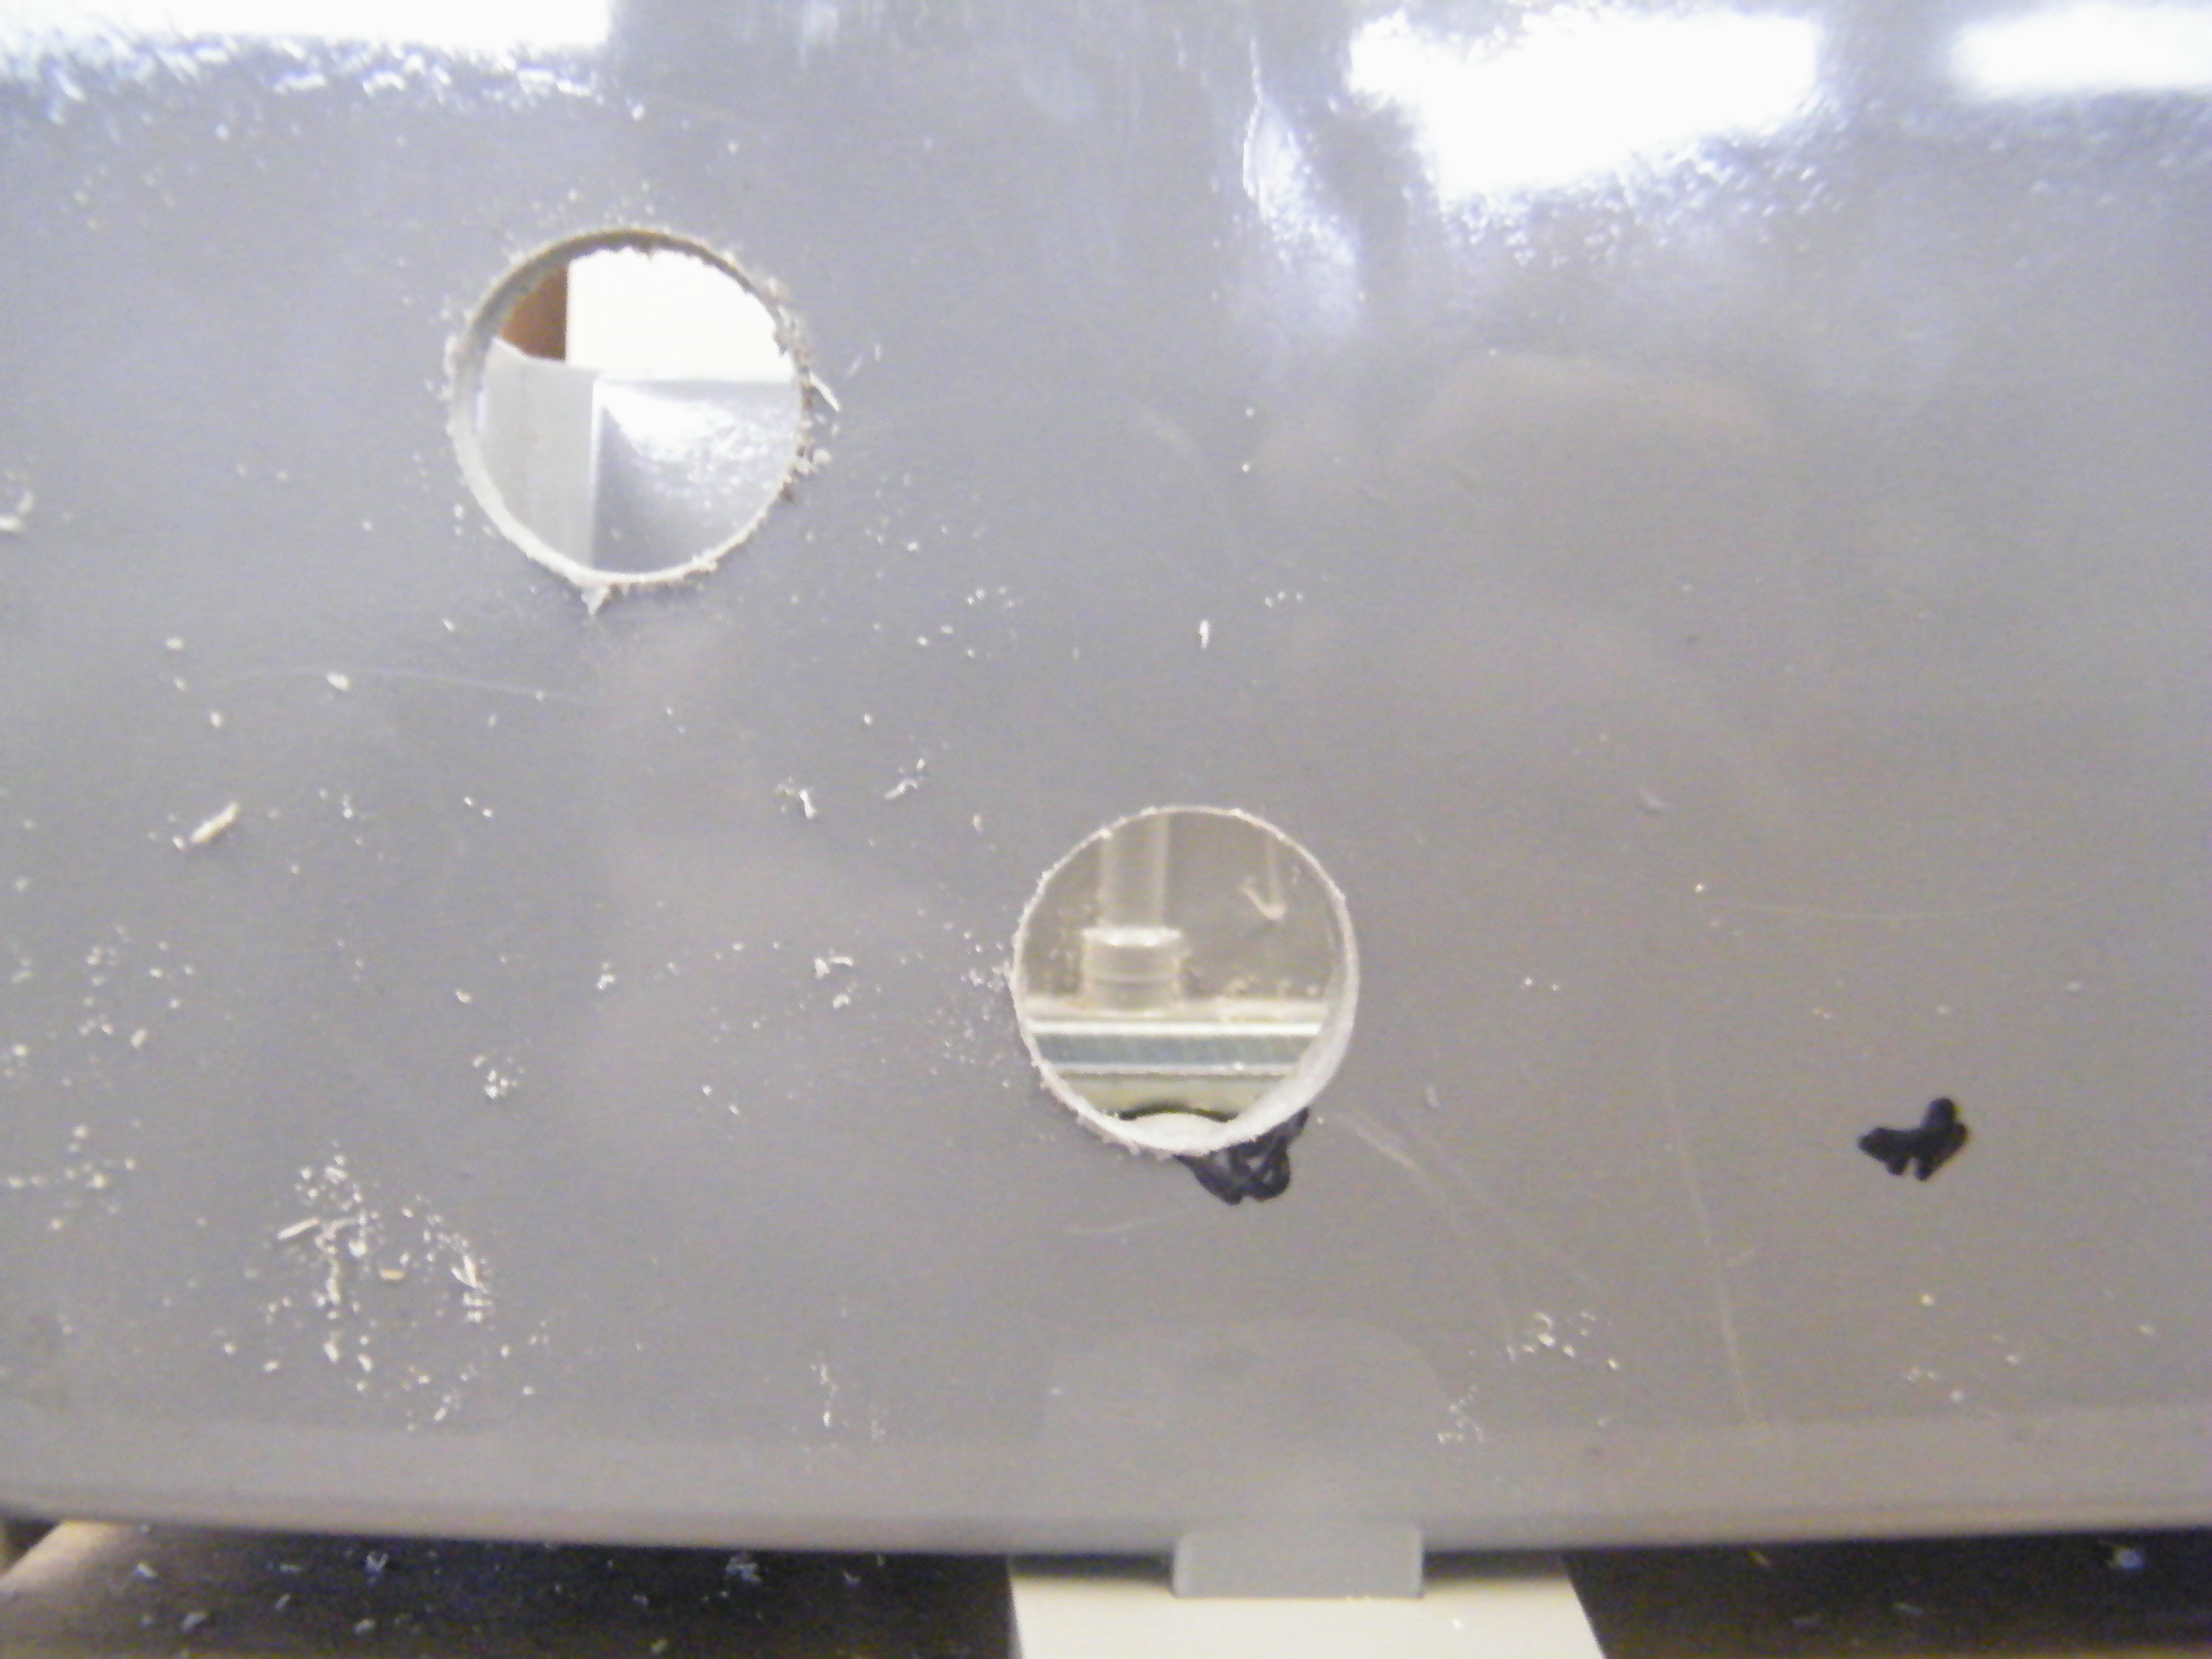
- BEFORE placing the EGX100 or power supply in the box, drill three holes into the box to provide access points to the power input, the wires coming from the magnet, and the top ethernet port (labeled 10/100 Base Tx). Choose the location of the holes so that wires running through them will take a short path to their ports. Because the hole will be used as space for a conduit screw (see photo documentation), select a drill bit that is appropriate for the diameter of the screw. See photo 3 for an example.
- Turn a conduit screw (see photo documentation) into each hole in the box. This conduit will give passage to all necessary I/O.
- The EGX100 and power supply have clips on their undersides designed to fix onto the din rail. With the clip open, place the EGX100 and power supply onto the din rail. Then, click it closed.
Coloring Conventions for Wires Connecting EGX100 to Enercept Meters
| Building | Color for + | Color for - | Color for Shield |
| Wildman | Black | White | Red |
| Hoerner | Orange | Brown | Green |
| AWC | Orange | Brown | Green |
Documentation
- Campus Electrical Schematic
- MIB for the PM8 (device mounted on the main switchgear)
- Register list for the Enercept/EGX100s (devices mounted in each of the buildings)
- Enercept Meter Installation Guide
- EGX100 Installation Guide
- EGX100 User Guide
- Siemens Sentron Pac3200
- PowerLogic PM800
- Sepam Series 20