Building monitoring
Contents
- 1 Energy Display Scripts Outline version 1.0
- 2 Energy Display Scripts Outline version 2.0
- 3 Harvest Scripts
- 4 Building Monitoring Data
- 5 Correct EGX100 Dip Switch States
- 6 EGX100 and Voltage Regulator
- 7 EGX100 and the Enercept Meter
- 8 Setting up an EGX100
- 9 Mounting an EGX100 for Installation in Building
- 10 Documentation
Energy Display Scripts Outline version 1.0
- Java scripts harvest data directly from Modbus
- Perl scripts collects this data and put it in the Postgress database "energy" under the table "electrical_energy"
- electrical_energy attributes:
- area - what building.
- preal - kW hours for that instant.
- date - date of harvest.
- electrical_energy attributes:
- A final perl script (display/production|development/js-file-gen.pl) accesses this data and generates a .png graph using the Google graph API
- This script takes one parameter for either the production or development branches.
- The images generated (day, week, month, year) are put in a html frame on a page to display the data.
- This page refreshes every 5 minutes
Energy Display Scripts Outline version 2.0
Postgres db
- Data stored in databse 'energy' under table 'electrical_energy'
- 'electrical energy' has the following attributes:
- area - which building.
- preal - kW hours for that instant.
- date - date of harvest.
data_gen.py
- generates a JSON file filled with data from a sql call to the database.
- requires Python 2.5
- file run by cron
- Main(building_file)
- Called from main loop.
- Calls CreateBuildingList(), ConnectToDatabase(), GetAllData(), EncodeData(), DisconnectFromDatabase()
- CreateBuildingList(building_file)
- Called by Main().
- For each building in building_file add to a python list.
- return that list.
- ConnectToDatabase()
- Called by Main().
- connects to 'energy' databse in Postgres
- returns database connection and the current name of database.
- GetAllData(db connection, building list)
- Called by Main().
- makes a python dict of all data
- calls GetBuildingData()
- replace unwanted dates from older buildings
- calls EqualizeDataValues()
- GetBuildingData(dbconnection, building)
- called from GetAllData()
- calls SetSQLQuery()
- returns rows from sql call and row count
- SetSQLQuery(building)
- called from GetBuildingData()
- Makes a sql call to the databse energy from the table electrical_energy
- returns rows from sql call and row count
- EqualizeDataValues(all_data, dates)
- fills null values for dates of newer buildings.
- returns all data
- EncodeData(all_data, dates)
- Called by Main().
- sorts all_data by date
- dumps data in JSON file, note: columns are organized alphabetically.
- initializes gviz metadata
- calls LoadData().
- writes JSON file which JS reads from.
- LoadData()
- Called by EncodeData()
- gviz api call
- encodes data to JSON file with headers.
- DisconnectFromDatabase()
- Called by Main().
- disconnects from database 'energy'.
main.js
- non-function
- creates several global variables.
- whichBiuldings: an array of booleans signifying which buildings get drawn
- buildingColors: an array of colors for each of the buttons and colors on the graph, change them here and only here.
- startDate, endDate: range on the graph, by default they are one week ago and today respectively, if the page was reached through a permalink these get modified.
- lineChartJSONData: this is the json file which data_gen.py makes, it's placed as a global so it doesn't have to be reloaded everytime a building is checked or unchecked.
- creates several global variables.
- flipAndRedraw
- called when a button is pressed
- flips values in the global whichBuildings[]
- calls drawLineChart() provided whichBuildings has at least 1 true value.
- flip(val)
- takes a boolean and returns its opposite.
- redrawVis(values[])
- Takes an array of booleans
- calls DrawLineChart()
- drawLineChart(buildingArray[], colors[])
- called when index.html loads and when RedrawVis() is called.
- takes an array of booleans processed by RedrawVis()
- creates a Dashboard
- creates a data table with the data source as the json file data-gen.py makes.
- creates a chart wrapper, this is where you can adjust basic settings about the main chart.
- creates a control wrapper, this creates the controling bar on the bottom. This is where you can adjust the starting range for the control wrapper.
- creates a listener for the 'statechange' event on the controlWrapper, when the control range is updated the dates are saved. When a building is unchecked and the graph redrawn, the selection stays the same.
- creates a listener for the 'ready' event on the chartWrapper. When chartWrapper is ready (all drawn) resizeControls is called.
- deletes columns in data table depending on the booleans that are in values[], the more columns that are deleted the better the performance.
- binds the chart wrapper and the control wrapper together, draws the chart.
- equalArrays(arr1, arr2)
- checks if the contents of arr1 are equal to arr2, returns true if they are, false otherwise.
- parseDate(urlArg[])
- takes the array of strings from a permalink and returns them as a date object
- parseInts(strArray[])
- takes the array of strings from a permalink and returns them as an array of integers.
- parseButtons()
- Takes button arguments from the permalink and unchecks the buttons on index.html accordingly using jQuery's removeClass medthod.
- removeIndices()
- processes and array to return containing indices of which columns delete and therefore not draw.
- genPermalink()
- generates a permalink to the chart's state and which buttons are checked. The format of the permalink is (url)/?(startDate, yyyy-mm-dd)%(endDate, yyyy-mm-dd)%(buttons, 0123)
- writes permalink to text box on index.html
- redrawControls()
- Accesses where the svg paths for the control are using getElementByTagName() and sets them using jQuery's attr method.
- This is called every time the graph sends a 'ready' event.
HTML+CSS
- index.html, the file people load.
- A small script detecting browser type adds the chrome class to #page-title. Without this page-title in chrome draws incorrectly, this is a chrome specific bug the tag draws correctly in all other browsers.
- includes jquery.minm.1.7.2, for gviz api
- main.js, draws graphs, handles data.
- bootratp-button.js, enables buttons to behave like checkboxes. Toggling these buttons updates a global array of booleans held in main.js, and then redraws the graph depending on which are selected.
- main.css, styling (some css3).
- there are several blank css elements for the buttons in the beginning, keep these lines where they are as main.js accesses them by an index and gives them a background-color attribute.
Improvements and Bugs
- Performance
- More resolution in the graph will come at the expense of performance, right now points on the graph are averaged values from each hour. It would be better for graph readability if points were every, let's say, two minutes, however the graph would be unusable. Already the control chart is graphing every 30 lines of data, perhaps as the data range expands there could be less points on the chart itself and when the range is small it could show more resolution.
Harvest Scripts
There is a unique harvest script for every individual building, but the only differences between these scripts are the value of the ip number and the . The harvest scripts are called by cron every minute.
Procedure for the Script
- 0. Sets a timestamp.
- 1. Sets a variable $pReal to the return value of java --cp with the following arguments:
- filepath to the production directory
- ModbusReadDemand
- the ip number of the EGX100 of the building in question
- the amperage correction of the building in question.
This return value represents electrical energy usage.
- 2. Connects to the energy database.
- 3. Inserts into the electrical_energy table (located within the energy database) a row for the energy usage of the building in question at the time of the timestamp.
Building Monitoring Data
| Building | Installed? | EGX100 IP | MAC Addr. | Directly off main switch? | Amperage Correction | Feed Size (Amps) | Square Footage* | Occupancy |
| Bundy | Yes | 159.28.165.100 | 00:80:67:82:99:34 | No | 31.25 | 800 | 50,012 | 165 |
| Barrett | Yes | 159.28.165.101 | 00:80:67:82:99:2e | No | 15.625 | 1600 | 30,636 | 147 |
| Wilson | Yes | 159.28.165.102 | 00:80:67:82:99:32 | No | 62.5 | 300/400 | 22,962 | 56 |
| Warren | Yes | 159.28.165.103 | 00:80:67:82:99:38 | No | 62.5 | 300/400 | 22,962 | 56 |
Mills
|
No | 159.28.165.104 | 00:80:67:82:99:2D | No | 31.25 | 800 (bus bar) | 132 | |
| OA | Yes | 159.28.165.105 | 00:80:67:82:99:3d | No | 31.25 | 800 | 26,703 | 122 |
Hoerner
|
No | 159.28.165.89 | 00:80:67:82:99:29 | No | 62.5 | 300/400 | 84 | |
| Carpenter | No | No | ||||||
Wildman
|
No | 159.28.39.52 | 00:80:67:82:DC:CF | No | 62.5 | 300/400 | ||
| Lilly | No | No | 61,000 | |||||
Gym
|
No | 159.28.8.116 | 00:80:67:82:DD:6B | No | 31.25 | 800 | ||
| Runyan | No | Yes | ||||||
| Stanley | No | No | ||||||
| Dennis | No | No | ||||||
| Noyes | No | No | ||||||
| Tyler | No | No | ||||||
| LBC | No | Yes | ||||||
| Stout | No | No | ||||||
| Total | No | 159.28.27.252 | 00:80:67:81:e9:cd | No | ||||
| Remainder | No | No | Unknown | (Total Feed Size - Measured Feed Sizes) |
* : By Square Footage we mean the summed square footage of all the floors
Mills energy usage can be checked with: Total_of_the_U - (Warren + Wilson) = Mills
Correct EGX100 Dip Switch States
| Pin Number | 1 | 2 | 3 | 4 | 5 | 6 |
| Up | Down | Down | Up | Up | Up | Up | Up |
EGX100 and Voltage Regulator
The voltage regulator takes 110/220VAC and converts it to 24VDC for the EGX100.
The V- port on the voltage regulator connects to port #6 on the EGX100
The V+ port on the voltage regulator connects to port #7 on the EGX100
EGX100 and the Enercept Meter
A solid orange wire goes from port #3 on the EGX100 to the + port on the RS485 node of the Enercept meter.
A solid brown wire goes from port #4 on the EGX100 to the - port on the RS485 node of the Enercept meter.
A solid green wire goes from port #5 on the EGX100 to the shield port (S) on the RS485 node of the Enercept meter
A 100 Ohm resistor is placed between the + and - ports on connector that plugs into the Enercept meter.
Setting up an EGX100
- Using an ethernet cord, connect a personal computer to the 10/100 BASE TX port on the EGX100.
- Type in the default ip address, 169.254.0.10, into a web browser, a password prompt should appear.
- If the EGX 100 is already configured (i.e. not the default configuration), be sure to be on the subnet 255.255.255.0 and assign your ip to the gateway ip 159.28.165.1
- Enter the default username is Administrator and the default password is Gateway
- Click on "Setup" in the top menu bar.
- Click "SNMP" on the sidebar
- Check the box "Enable SNMP" and configure the rest of the settings: contact information to "Charlie Peck," set system name and system location appropriately.
- Click the apply button to apply changes.
- Click on TCP/IP in the sidebar
- Configure the TCP/IP information here.
- IP address for the EGX is in the table below, gateway is 159.28.165.1, subnet is 255.255.255.0
- Click "Apply" the device will essentially reboot and you will have to log back in to make any more changes. Login through the new device gateway and subnet to make sure changes stuck.
- Log out of the EGX.
- That's it the device is configured and good to go.
- Troubleshooting with Wireshark and the ping command will reveal a lot if needed.
- The EGX100 Manual is also helpful to have on hand to decode the blinking lights.
- The reset button on the EGX100 only power cycles the device, it does not actually clear any data according to the manual.
Mounting an EGX100 for Installation in Building
- Cut a length of din rail sufficient to mount an EGX100 and its power supply. 13 cm is sufficient.
- Place the rail so that its center is as close to the box's center as possible. Mark holes at the rail hole locations and drill holes into plastic box at those locations.
- Turn the screws into the holes to secure the rail onto the box.
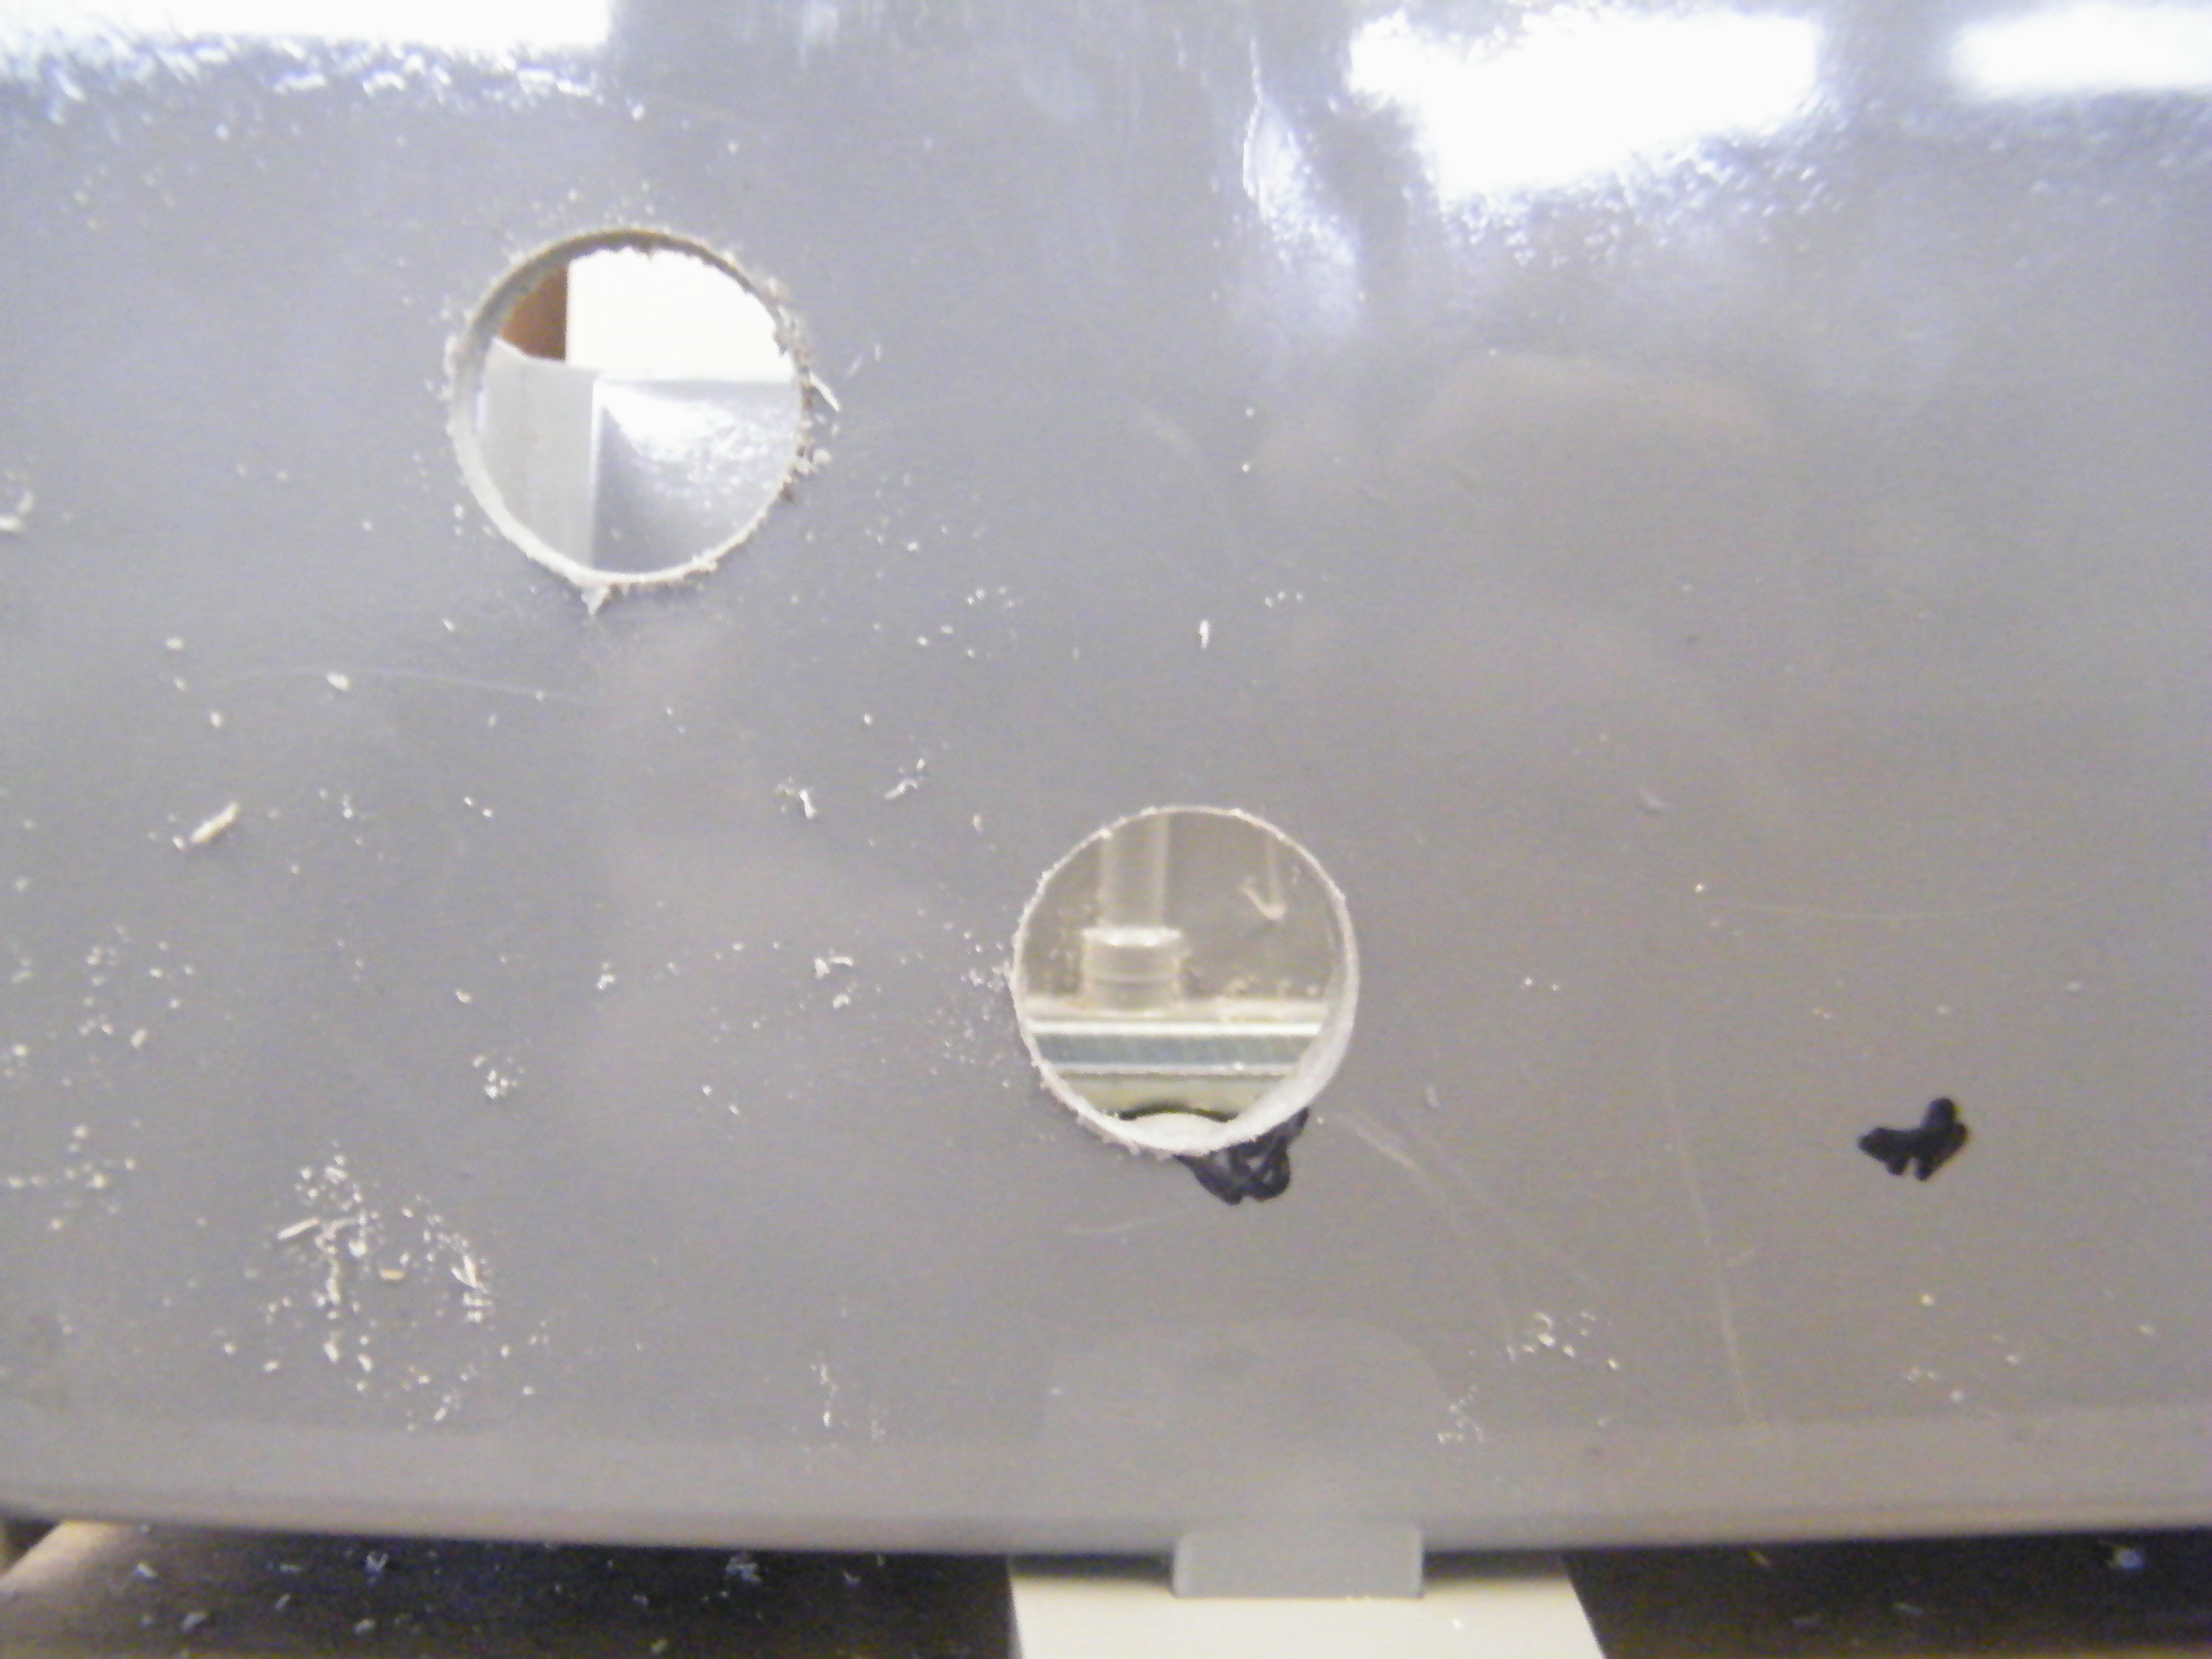
- BEFORE placing the EGX100 or power supply in the box, drill three holes into the box to provide access points to the power input, the wires coming from the magnet, and the top ethernet port (labeled 10/100 Base Tx). Choose the location of the holes so that wires running through them will take a short path to their ports. Because the hole will be used as space for a conduit screw (see photo documentation), select a drill bit that is appropriate for the diameter of the screw. See photo 3 for an example.
- Turn a conduit screw (see photo documentation) into each hole in the box. This conduit will give passage to all necessary I/O.
- The EGX100 and power supply have clips on their undersides designed to fix onto the din rail. With the clip open, place the EGX100 and power supply onto the din rail. Then, click it closed.
Documentation
- Campus Electrical Schematic
- MIB for the PM8 (device mounted on the main switchgear)
- Register list for the Enercept/EGX100s (devices mounted in each of the buildings)
- Enercept Meter Installation Guide
- EGX100 Installation Guide
- EGX100 User Guide