Difference between revisions of "3D Printers"
Jump to navigation
Jump to search
(→Taz Lulzbot 3D Printer) |
(→Taz Lulzbot 3D Printer) |
||
| Line 85: | Line 85: | ||
*After a few seconds, the LCD will display the info screen again and the printer will start heating up. Wait until the temperatures reach 240C and 64C. | *After a few seconds, the LCD will display the info screen again and the printer will start heating up. Wait until the temperatures reach 240C and 64C. | ||
*In the info screen, press the knob again. Scroll down and select “Print from SD” Select your file and it will start printing right away. | *In the info screen, press the knob again. Scroll down and select “Print from SD” Select your file and it will start printing right away. | ||
| + | **Make sure to remove any excess filament extruding from the nozzle with tweezers as the print starts | ||
*Once the printing has finished, the bed will move away until it has cooled to 50C | *Once the printing has finished, the bed will move away until it has cooled to 50C | ||
*Once the bed has cooled, it will move back towards you and then carefully remove the 3D printed object. | *Once the bed has cooled, it will move back towards you and then carefully remove the 3D printed object. | ||
Revision as of 09:18, 14 June 2017
Contents
Introducing our 3D printers:
Printing instructions:
Desiging your own 3D model:
Software: OpenSCAD
Cheat Sheet: http://www.openscad.org/cheatsheet/index.html
After creating your own 3D model follow this steps:
- Render and compile your code by pressing F6
- Export the design as .stl
- If the file is in your own computer, move the file(name.stl) to the Mac found in Turing lab(CST 222)
Overhang / Supports
Software: Meshmixer
Once you import a pre-existing model:
- Use the align tool under the Edit tab to place model on bed
- Use the overhang tool under the Analysis tab to generate supports for the model
- Export as " *.stl " when finished
Instructions on how to use the 3D printers:
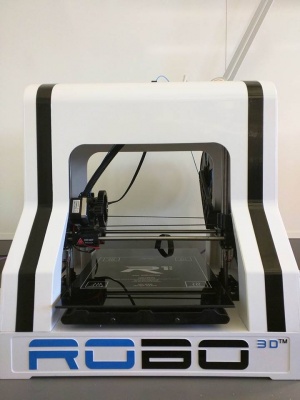
Robo R1+ 3D Printer
Software for the printer: MatterControl
Printing from an SD card:
- Insert a microSD card into the Mac and get rid of any files in it.
- Open MatterControl and drag your .stl file into the QUEUE section of the application.
- On the top-left section, click on “Select Printer.” Select “Robo 3D TM Turing” in the window that pops out.
- Towards the bottom of the QUEUE section, you will find a “Queue” button. Click on it to get a list.
- On the list, below GCode, select “Export to Folder or SD Card.” Click on the microSD card under “Devices” in the side panel and click on “Export”
- Now, in Finder, browse to the microSD card and rename the file you just exported as “auto0.g” (auto zero dot g). Choose “Use.g” if a prompt appears.
- Then, safely remove the microSD card from the Mac and insert it into the Robo 3D printer.
- Prep the build plate using one the following:
- Glue Stick
- Vinyl Sheeting
- Hairspray
- Apply whichever product on the surface of the build plate enough to cover the surface you will be printing on.
- Turn the printer on. Your print will start after about 5 minutes.
- After the print is over, wait for the temperature to cool down and carefully remove the 3D printed object from the build plate.
- Clean the build plate.
Printing from the computer:
- Open MatterControl and drag your .stl file into the QUEUE section of the application.
- On the top-left section, click on “Select Printer.” Select “Robo 3D TM Turing” in the window that pops out.
- Under "Settings" ensure that the correct material is selected.
- Under "Controls" an offset of 0.9 typically shows the best results.
- Pre-heat the extruder and bed on the same page.
- Alternatively, near the top center of the screen, an extruder temperature and a bed temperature will be shown, mouse over and click "pre-heat" for both.
- Prep the build plate using one the following:
- Glue Stick
- Vinyl Sheeting
- Hairspray
- Click print once the printer has heated up.
- After the print is over, wait for the temperature to cool down and carefully remove the 3D printed object from the build plate.
- Clean the build plate.
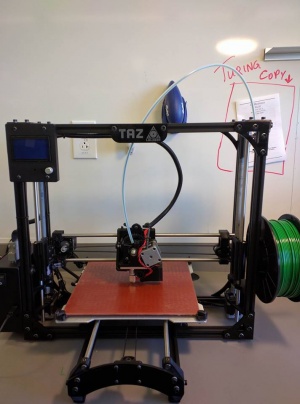
Taz Lulzbot 3D Printer
Software for the printer: Cura
Steps to follow in order to print:
- Insert a microSD card into the Mac.
- Open Cura and press “Load Model” to upload the ".stl" file you want to print.
- Click “Save gcode” and then choose the SD card under the “Devices” panel.
- Make sure the Taz 3D Printer is turned on.
- Safely eject the SD Card from the Mac and insert it into Taz Printer (on left side of the LCD screen)
- Make sure the SD card has the pins facing towards you when insert it
- Back on the LCD screen, rotate the knob counter-clockwise to decrease the print speed to ~50%
- This is to ensure that the plastic is coming out properly by the time the print starts
- Once the first few layers are printed, the print speed can be raised to 100% or more
- Press the knob, scroll down by rotating the knob clockwise and select “Temperature”.
- Select “Custom Temp” and set the "Nozzle" to 240 and "Bed" to 64
- After a few seconds, the LCD will display the info screen again and the printer will start heating up. Wait until the temperatures reach 240C and 64C.
- In the info screen, press the knob again. Scroll down and select “Print from SD” Select your file and it will start printing right away.
- Make sure to remove any excess filament extruding from the nozzle with tweezers as the print starts
- Once the printing has finished, the bed will move away until it has cooled to 50C
- Once the bed has cooled, it will move back towards you and then carefully remove the 3D printed object.
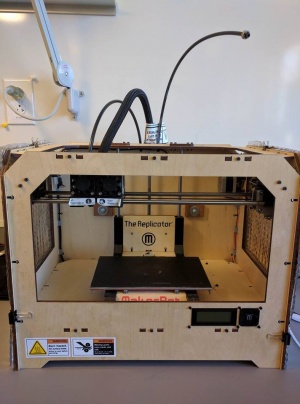
MakerBot 3D Printer
Software for the printer: ReplicatorG
Steps to follow in order to print:
- Insert a microSD card into the Mac.
- Open ReplicatorG, drag and drop your stl file into application screen.
- Adjust your model if you need to.
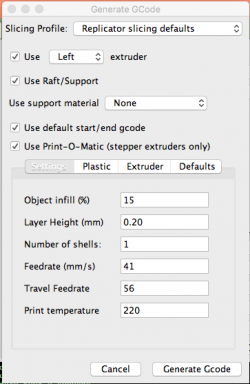
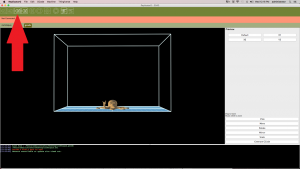
- Select “Generate GCode” on the bottom right.
- Make sure the values are set as shown in the image below and then select “Generate GCode”
- If prompted with an “Acceleration Warning” select “OK”
- Wait until it generates the gcode.
- After the file is generated go to the gcode tab and modify the numbers on the lines M104 should be 230 and M109 should be 128, i.e.:
- M104 S230 T1 (set extruder temperature) M109 S128 T1 (set HBP temperature)
- Make sure to save it by pressing “Command + S”.
- Select “Build to file using SD Card” as shown in the image below. Select the microSD card and make sure to save it as “.x3g” format.
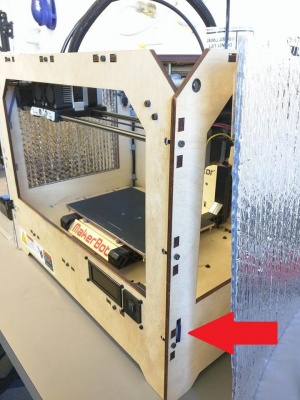
- Wait until it is done building and then safely eject the sdCard from the Mac and insert it into the MakerBot. Note: You can find the sdCard slot as shown in the image below:
- Turn on the printer.
- Select “Build from SD” and then using the arrows scroll down to your file.
- The printer will start heating up and once it finishes heating up, it will start printing.
- Once the printing has finished, wait for the bed to cool down and carefully remove the 3D printed object.
